
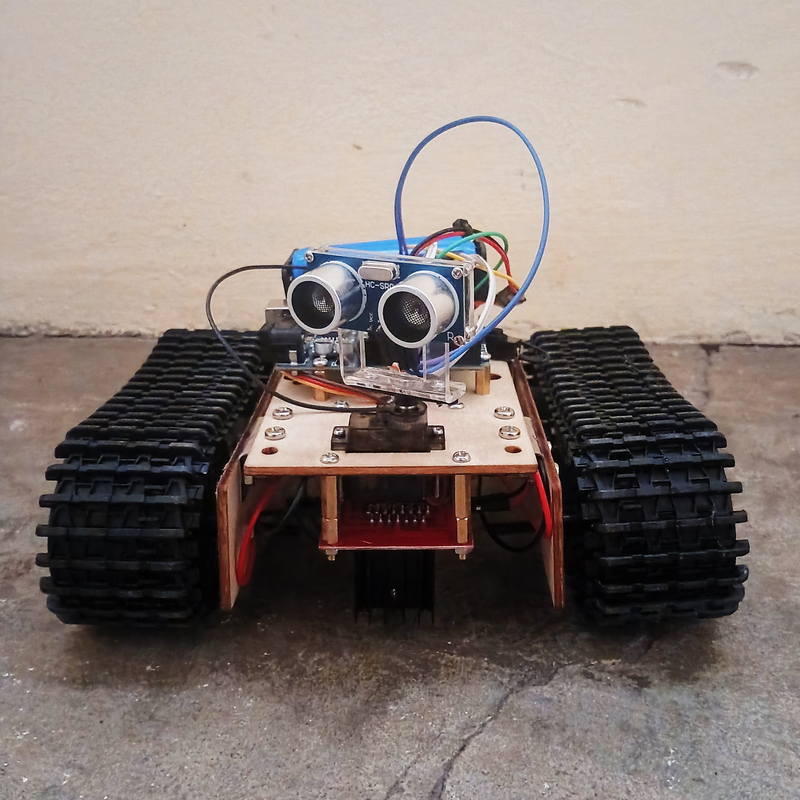
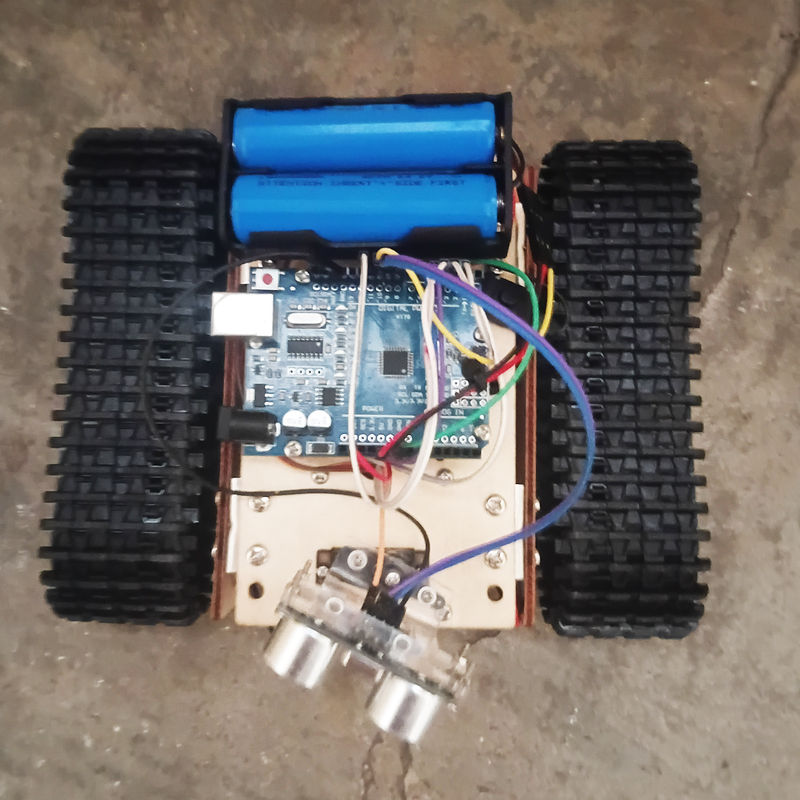
Overview
Small, simple, and remote-controlled
Three modes
Let her roam on her own in obstacle mode (the default at boot), drive her like a car, or control each track like a tank.
Diagonal scanning
While driving, the sensor sweeps ahead and to both diagonals, so walls met at an angle are caught before a track corner hits them.
Variable turns
She backs up, looks left and right, and turns towards the open side: 45–90° into open space, up to a full 180° when boxed in.
Collision guard
In manual modes she force-stops if something gets within 15 cm while driving forward, and WASD stops as soon as you let go.
Four presets
Cycle 100 / 75 / 50 / 25 % with the remote's OK button.
Buzzer & serial
A beep at power-up and when she stops for an obstacle. Distances, turns, modes and IR codes are printed at 115200 baud.
Hardware
What she's built from
- 01 Small wooden tank robot chassis
- 02 Arduino Uno (or Nano)
- 03 2S 18650 battery pack
- 04 L298N motor driver
- 05 MG95 servo
- 06 HC-SR04 ultrasonic sensor
- 07 5 V DC motors
- 08 IR receiver + IR remote
- 09 Buzzer
Pinout
| Sensors, servo & buzzer | Pin |
|---|---|
| Ultrasonic TRIG | 8 |
| Ultrasonic ECHO | 9 |
| Servo | 10 |
| IR receiver | 11 |
| Buzzer | A0 |
| L298N | Pin | |
|---|---|---|
| ENA | 5 (PWM) | Right speed |
| IN1 / IN2 | 2 / 3 | Right motor |
| ENB | 6 (PWM) | Left speed |
| IN3 / IN4 | 4 / 7 | Left motor |
Remove the ENA / ENB jumpers on the L298N, otherwise the speed setting does nothing. Pins 5 and 6 are the only PWM pins left free: the Servo library uses Timer1 (pins 9/10) and IRremote uses Timer2 (pins 3/11).
Controls
Everything from the IR remote
Autonomous
She drives herself, scanning ahead and to the diagonals and turning away from whatever is in the way. This is the mode she boots into.
Car-style driving
Hold an arrow to drive forward, back, left or right. Let go and she stops.
Independent tracks
Each colour button switches one track on or off. Press it again to switch that track off.
Tank mode buttons
| Button | Track |
|---|---|
| Red | Left forward |
| Green | Left backward |
| Yellow | Right forward |
| Blue | Right backward |
Red + Yellow drives straight ahead. The receiver can only read one button at a time, so the tracks latch on and off instead of needing to be held. OK cycles the speed in any mode.
IDA link: driven by NORA
NORA can drive IDA through her IR transmitter, from NORA's web page, Python controller or Bluetooth link. The link has its own protocol so nothing else in the fleet reacts to it: Samsung-format IR (38 kHz), address 0x0DA1.
| Code | Command |
|---|---|
0x48 | Forward |
0x49 | Backward |
0x4A | Left |
0x4B | Right |
0x4C | Stop (also leaves Obstacle mode) |
0x4D | Obstacle mode |
0x4E | WASD mode |
0x4F | Cycle speed |
A drive command switches her into WASD mode by itself. NORA re-sends it every 150 ms while held, and IDA stops once the link has been quiet for 500 ms. Link frames print on the Serial Monitor as LINK:0x...
Talking with NORA
NORA chats with IDA over the same link (0x40 hello, 0x41 how are you, 0x42 happy, 0x43 curious, 0x44 sleepy, 0x45 let’s play, 0x46 bye, 0x47 “I am here” beacon (silent)). IDA answers in Brainfuck: every phrase is a program that prints its words, beeped one tone per symbol, and she beeps her reply program back and prints TALK:<phrase> on the Serial Monitor, and greets NORA when she comes back after a minute away. While she’s driving she just chirps, so answering never holds up the obstacle checks.
Using a different remote? Press its buttons with the Serial Monitor open: each one prints as IR:0x... Copy those codes into the IR_... defines at the top of IDA.ino.
Quick start
From USB cable to driving
You need the Arduino IDE, the bundled Servo library and IRremote v4+ from the Library Manager.
- Check the motors first. Upload
scripts/motor_test/motor_test.ino. It repeats forward, backward, left and right for 1.5 s each and prints each step on the Serial Monitor. If a track spins the wrong way, swap that motor's two wires on the L298N (OUT1/OUT2 or OUT3/OUT4) instead of changing the code. - Upload
scripts/IDA/IDA.ino. On power-up the servo sweeps left and right, she beeps, then starts in obstacle mode. - Take over with 2 or 3 on the remote.
Tuning
These values are at the top of IDA.ino. Edit them and re-upload over USB.
| Setting | Default | What it does |
|---|---|---|
| turnTime | 550 ms | About a 180° pivot. Obstacle turns are a random 1/4 to all of this. Increase if her 180 falls short. |
| stopDist | 35 cm | How close an obstacle straight ahead gets before she stops and scans. |
| diagStopDist | 35 cm | The same, for the diagonal looks. |
| backupTime | 250 ms | How long she reverses before scanning (0 turns it off). |
| guardDist | 15 cm | How close an obstacle gets before the guard stops a manual drive. |